Tampilkan postingan dengan label 3d. Tampilkan semua postingan

Intuitive home screen replacement and launcher with integrated viewers 3D UI

Selasa, 20 Desember 2016

0 komentar
Claystone Launcher v1.0.3739 for Android 2.1 and higher
Claystone Launcher v1.0.3739

Claystone is designed to go far beyond what you typical phone experience offers. The basis of this enhanced experience are the Claystone Stacks.

Within these Stacks, you can quickly queue up and browse through a wealth of content, including: websites, videos, photos, RSS feeds, YouTube, and more.

*** New Claystone Theme ***

Blueberry is a theme designed for the Claystone Launcher that introduces a lighter, more colorful appearance through the inclusion of new background images, button styles, and more.

*** Additional Themes Coming Very Soon ***

Additional themes will be available on a regular schedule as we continue to expand, enhance, and customize your Claystone Launcher home screen experience.

Getting Started Guide (PDF Format)

- [url]http://claystoneinc.com/wp-content/uploads/2011/06/Claystone-User-Guide-1.0.pdf[/url]

We Welcome Your Feedback

- We welcome your comments, feedback, suggestions and requests for additional Claystone themes.

Share Claystone Easily

- Spread the word and let people know you use Claystone
- We have made it even easier to share Claystone with the latest update
- Use the convenient Share Claystone button on the Options Menu to share Claystone with your friends.
- You can also conveniently rate Claystone and send the Claystone Team a feedback email from Claystone preferences.

Innovative Navigation

Navigating these stacks is just as easy as other smart phone interfaces. We’ve added a touch of 3D as a visual cue to help you easily navigate the stacks.

Claystone’s refined navigation system allows you to organize and manage applications, media, and documents more efficiently than ever.

Customization and Consistency

Claystone let’s you customize your widgets and Launchbar, add shortcuts, create folders, organize your apps and documents, create website shortcuts all within Claystone’s consistent unified interface.

Enhanced App Management

Claystone integrates all your favorite apps, and lets you browse through them while viewing videos, websites, photos, and other media for a more consistent experience.

Apps are organized in an intelligent manner, ensuring you don’t have to look very far to access them at any time.

Dynamic Content Handling

With Claystone, your favorite websites, photos, and videos are all presented amongst one another, standing side-by-side as you browse through them.

This erases the dependence on starting a separate app for each content type, permitting you to enjoy them all – quickly and efficiently – with incredible convenience.

Technical Support

- [url]http://claystoneinc.com/support/[/url]

Minimum Requirements

- Android smart phone or tablet
- Android 2.1 and higher
- OpenGL 1.1 and higher
- Normal screen size or higher
- Medium screen density (160 mdpi) or higher

[u]More Info:[/u]
[code]https://market.android.com/details?id=com.claystoneinc[/code]


Download :
Claystone Launcher v1.0.3739

Mirror:
http://www.filefat.com/wae89ci757qt
http://www.multiupload.com/8XX5VNIPT2
Read More..

SPB Shell 3D v1 2 android apk home screen

Rabu, 28 September 2016

0 komentar
SPB Shell 3D update v1.2
SPB Shell 3D v1.2

SPB Shell 3D has been updated again this week, tossing in a number of oft-requested features.
Aside from general improvements in settings and general design, v1.2 now includes a bookmarks folder, a better contacts widget, and 3D edit mode. SPB also tosses in a couple of experimental features in with the ability to toggle smartphone and tablet modes as well as a stereoscopic 3D mode.

Version 1.2 (Jul 26, 2011):
Landscape support (Home settings->Appearance)
3D edit mode
Multiple cities in weather
Stereoscopic 3D (experimental)
Switch between smartphone/tablet mode
(experimental)
Improved settings
Improved calendar panel
Improved overall design
Performance optimization
Bookmarks folder
3D call log
Folder selection for gallery widgets
Improved contact widgets management

If you havent had a chance to check out SPB Shell 3D,nows your chance. The app runs $14.95 and works on any Android device with 2.1-2.3.3. Before you balk at that price tag, consider the 4-star rating (12,342) and nearly 1 million installs. Since it works on top of stock Android, Sense UI, and any other skin, this guy is definitely worth the money!

Instal SPB Shell 3D v1.2 from :
http://www.appbrain.com/app/spb-shell-3d/com.spb.shell3d
OR
https://market.android.com/details?id=com.spb.shell3d
Read More..

SPB Shell 3D v1 2 1 for Android 2 1 2 3 3 Rooted

Jumat, 16 September 2016

0 komentar
SPB Shell 3D v1.2.1
Requirements: Android 2.1 - 2.3.3 (Rooted)
SPB Shell 3D: next generation user interface.

SPB Shell 3D v1.2.1

If you are not able to launch SPB Shell 3D, please use "Home Switcher" application from Android Market.
Next generation user interface. Enjoy your phone!
To launch SPB Shell 3D press the Home button once installation is completed.

Features:
3D Home screen/launcher
Smart folders
3D widgets
Collection of panels and widgets

Check out our FAQ here:
If you are not able to download purchased application please check that your order wasnt declined by Google Checkout. You can check your order state at "http://checkout.google.com".

Release notes:
This is not a cracked release, you can look at it as a distribution. 8)
I found some more info on getting this application to work, either or neither you purchased it. The only thing is a rooted phone is a must.

Open any Terminal app, and after installing (but not opening) the app:
su
pm disable com.spb.shell3d/com.softspb.shell.service.LicenseService

To re-enable the app if it has disabled itself due to licensing:
su
pm enable com.spb.shell3d/com.softspb.shell.Home
best way to use this app just freeze market app by titanium backup
I am not responsible for stuff like its not working, or something else that will happen. Dont kill the messenger.


More Info:
https://market.android.com/details?id=com.spb.shell3d

Download :
SPB Shell 3D v1.2.1

Mirrors :
http://uploading.com/files/95mf6ba8/spb.shell3d121.apk
Read More..

New APK Market iMarketApk » Blueprint 3D v1 0 4 Mod

Minggu, 28 Agustus 2016

0 komentar
Blueprint 3D v1.0.4 + Mod

Requirements

http://iMarketApk.blogspot.com/ [New] APK Market iMarketApk » Blueprint 3D v1.0.4 + Mod [Torrent Modded apk] Free APK are available on every other topic you can think of in both fiction and non-fiction of. There are free Android APK available for adults and children and even between and teenagers. It may seem overwhelming to find and download [android apk] Hack no survey [New] APK Market iMarketApk » Blueprint 3D v1.0.4 + Mod ҩ MOD but with the steps below youll be just minutes away from getting APK.: Android 2.3.3 and up

http://iMarketApk.blogspot.com/ - Overview about Blueprint 3D v1.0.4 + Mod

Full Download MOd [New] APK Market iMarketApk » Blueprint 3D v1.0.4 + Mod and Torrent Link

: AN ENTIRELY NEW GAMING EXPERIENCE

"In the crowded market of puzzle apps, Blueprint 3D shines for its uniqueness."

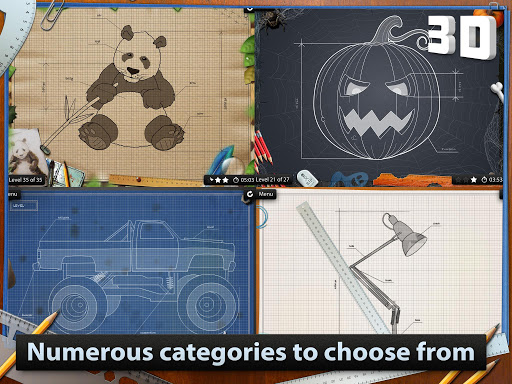
Magical 3D motion puzzle game

Never before seen gameplay

• OVER 300 LEVELS OF PURE AMAZEMENT!

Each level begins with a mysterious clutter of seemingly chaotic dots and lines. Underneath all the chaos, however, lies a beautiful blueprint image waiting to be uncovered. It’s right there in front of you: Just drag your finger across the screen to rotate the figure, and all of a sudden you’ll notice that the lines start to make sense! Solve the puzzle by rotating the figure in all directions and on all planes until you hit the sweet spot. Once you’re there, the secret picture will reveal itself. Wait till you see this in action!

• INCLUDES 11 THEMES AND FREE UPDATES!

Reveal hundreds of artistic images and amaze your friends with the magic of this app. Select your picture challenge from the following themes:

• ORIGINAL SOUNDTRACK

Each theme comes with its own original music, but feel free switch to your favorite tracks in iTunes. Whatever your musical preference, this app is sure to deliver a delightfully artistic multimedia experience.

• TROPHY ROOM, ACHIEVEMENTS AND LEADERBOARD

Earn trophies while you unlock new images and add your prizes to your Blueprint 3D trophy room. Unlock Google Game Service achievements and post the leading high score.

Feature Overview:

✓ Amazing 3D Motion Puzzle

✓ More than 300 Levels

✓ 11 Theme Packs

✓ Google Game Service Support

✓ HD Graphics

✓ Smooth Graphics

✓ Original Soundtrack

✓ Trophy Room

✓ Global High Scores

✓ Achievements

Whats in this version :

- Bug fixes and optimisation

- Optimisation for devices with Intel CPU

More Info Blueprint 3D v1.0.4 + Mod

You can directly download the apk file with torent modded or just in iMarketApk

Android APK Files [New] APK Market iMarketApk » Blueprint 3D v1.0.4 + Mod Full And No Hack No Survey No ROOT

:

https://play.google.com/store/apps/d...ueprint3DHD.gp

Download Instructions:

Download Url

Download Url

Download Url

Mod: Unlimited Tips:

Download Url

Download Url

Download Url

SDCard/Android/obb:

Download Url

Download Url

Download Url

Read More..

New APK Market iMarketApk » FREE Pull A Pig 3D Pig Slinging Fun

Rabu, 10 Februari 2016

0 komentar
A cool new game Pull A Pig 3D Pig Slinging Fun

★★★ Introducing Pull A Pig 3D Pig Slinging Fun ★★★

Free APK [FREE] Pull A Pig 3D Pig Slinging Fun:

***Warning, high risk of Rage Quits ***

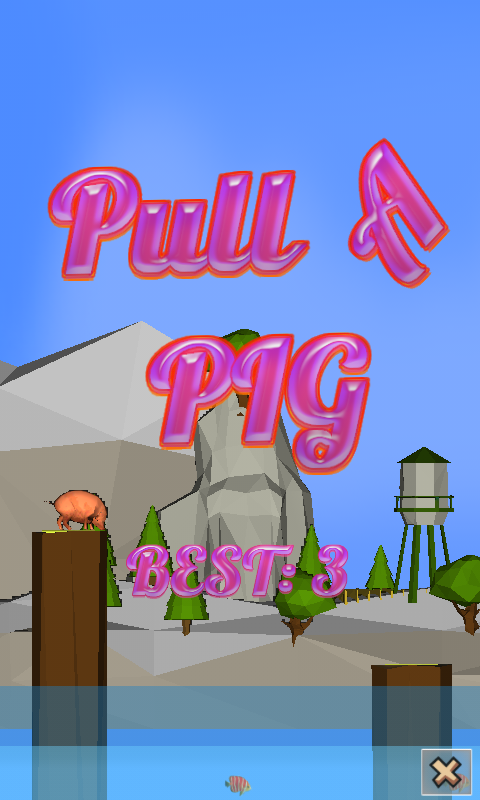
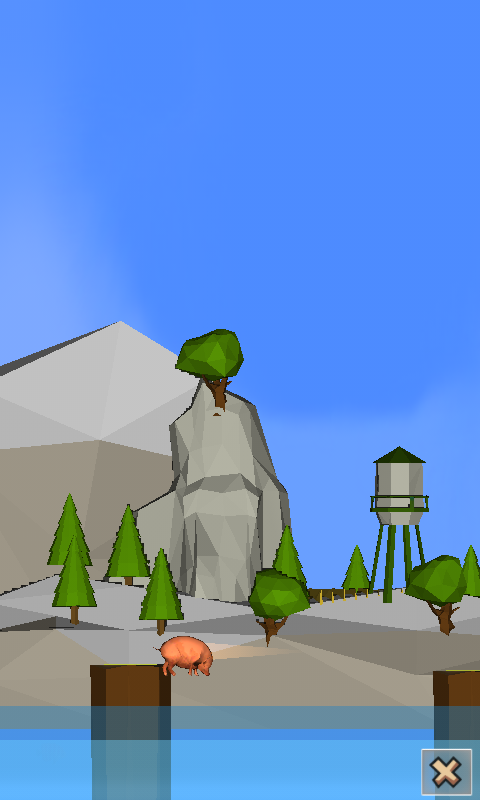
Pull a pig is a fun addictive physics game,

help your pig jump from post to post,

avoid the water and dont jump off screen.

simple controls,

touch the pig, drag back, let go, that easy

really easy... its actually not at all easy, the reality is this is really hard, frustratingly difficult

if you like "angry birds" or "sheepop" you will love "Pull A Pig"

dont forget to rate it and share with your friends,

thanks for your support

Link to google play: https://play.google.com/store/apps/d...nival.PullAPig

Requires Android: 2.3 and up

I recommend you to download this new and awesome game.

Enjoy!!

Read More..

DYNAMIC PAINT 3D Halftone Matrix Painting

Senin, 27 Januari 2014

0 komentar
Lets start 2012 with another Dynamic Paint works.

OK, I dont know what exactly to call this effect in 3D, but in 2D world for example you can break a solid image into a halftone pattern image, as below: (I use Photoshop filter)

2D Halftone Pattern Effect

So maybe we can call it 3D halftone effect. Basically we will reproduce the appearance of 3D solid geometry and represent it with many little dots or other geometry.

NOTE: I think BMW ads is using this effect and there is this neat installation with many ping-pong balls. I cant remember, but its sort of what it is we are trying to create.

There is a similar effect called Voxelation in which turning 3D geometry solid into a 3D voxelated image based on grid. But if you want to do Voxelation in Blender, you use the incoming modifier called: Remesh Modifier as stated here:
http://blendersushi.blogspot.com/2011/12/vfx-remesh-modifier-for-voxel-animation.html

Creating this 3D HALFTONE EFFECT is relatively "easy" to do using Dynamic Paint, just because the way it handles vertex weight and takes care of everything magically. It is just not very obvious and it is sort of an advance effect. But you will learn to do it today.

PREPARATION
Lets start with a simple 2D matrix grid and 3D geometry that we want to "halftone". Dont worry, we will turn it into 3D MATRIX GRID, so you will end up with 3D halftone object.

I think 32 x 32 GRID should be enough, 1089 vertex points in total to do the halftone-ing job. Create a mesh-plane, subdivide it 5 times so you get exactly that 2D MATRIX GRID. You can subdivide it more later.

Just a grid.
Now, create the 3D geometry that you want to halftone. I use Poly Torus for now. Anything with volume is good because we will turn this into a Dynamic Paint Brush with proximity to the volume.
2D grid + Torus

TURN ON DYNAMIC PAINT
1. Turn the 2D MATRIX GRID into Dynamic Paint: CANVAS. Surface Type should be set to Weight. Then activate Dynamic Paint Output: dp_weight (default).
2. Turn the 3D geometry, torus in this case into Dynamic Paint: BRUSH. Dynamic Paint Source should be set to Mesh Volume + Proximity.

PARTICLES IS THE KEY
Particles just love Dynamic Paint and together they are powerful as they can influence each other. We will achieve the effect using Particles.

So activate Particles on the 2D MATRIX GRID. Since we know the exact total of vertex number to emit particle, set the number to 1089, Emit from Vertex, uncheck Random.

Set Vertex Groups Density and Length into dp_weight. Switch Particle Type from Emit to Hair and activate Advanced. This is the most important step.

You should get something like below.


Now, all we need to do is just turn the Hair back as Particle Instance. Use poly Sphere geometry as instances:

If you cannot see the result of "dots pattern", increase the size of instances.
As you can see the effect is already working!

If you adjust few settings just so that the torus is not rendered, and you just want the halftone, you get this:

I like the 2D look, its simpler.

I think thats kind of neat. Its the magic of Dynamic Paint and how it can approximate weight based on the Brush volume and its distance to the Canvas.

If you now change the Particle instances into something else (Cube for example) you get this:

Looks familiar? Its the Voxel effect with halftone.
And what if we duplicate the 2D Matrix Grid view times (using Array modifier) so we have more slices in the Z direction. Enough to cover the whole torus volume. You have 3D Matrix Grid that gives 3D Halftone Effects, such as below:
3D Dot Halftone Effects
Try this effect on other 3D geometry with volume. Text object is a good candidate, but other geometry will work as well. The good thing about this is that this is all work in REALTIME and you can actually animate it to create an interesting animation.

Since this is a Dynamic Paint setup, you can get lots of interesting effects featured by Dynamic Paint already, such as the fading of weight as you move the 3D geometry brush around 3D canvas space. Volumetric effect like smokes works a little like this, I reckon.


ONE MORE THING....
Albeit the limitation, Blender has more or less procedural effect via its modifer. Below, for example, I further disturb the 3D matrix with Displace modifier, controlled by Empty (Locator) below, when I move the locator, it will move the 3D Halftone Dots.


Now, if you instance them with colorful balloon material and render using Pixar Renderman, you have balloon effects like in Pixars "Up". All you need is thousands of thread connected below each instance.

How do you get and control the color of each ballon? I will let you figure it out how.


What even more interesting is if you instance some animated objects. Maybe crowd of fish? Butterfly?
Read More..

Successful 3D Printing Part 1

Rabu, 08 Januari 2014

0 komentar
Here are a few key things to achieve a successful print. (This applies to PLA, I have not printed with ABS yet, but will do so when I get my ABS cartridges).
  1. A printable model. See posts in this blog: "Model build setup", "Part orientation and Part scaling".
  2. Make sure the print bed is level. NOTE: See my other post "print bed leveling aid", This is a "must" do, so you dont have to remove your top print platform to adjust the leveling. Once I have leveled the print bed, I only re-check it after a couple of prints if I keep printing smaller parts. For large parts, I would recommend checking it before every print, since it is critical to have the proper gap over the entire large part to maximize first layer adhesion and therefor minimize the part warping and pulling up from the print bed.
  3. Check the z-gap before every print.  This is a quick check and easy to adjust, but it is critical to get good adhesion to the print bed. (I set the gap to just under 0.1mm or even smaller for large parts) Some use a sheet of paper for checking the z-gap. Before checking the z-gap, make sure there is not any dried up plastic at the end of any print jet before checking the z-gap. Sometimes its just a tiny piece of plastic stuck at the end of the jet tip and it can give you a wrong z-gap reading.  I will run some tests and see how stable the z-gap stays after removing the print bed several times. Also will try if "Homing" before every print will make any difference.
  4. Have the proper amount of glue applied on the print bed. For PLA you only need a very thin even layer of glue. I spread the glue very thin evenly over the print area and let it get tacky. If you apply too much glue or dont let it get tacky, the plastic might smear on top and not stick. If you apply too little glue or no glue, the plastic might not stick as well. The glue also helps to remove after the print since it is water dissolvable. Overall it does not need much glue for PLA, just and even tacky thin layer. I swipe back and forward over the applied glue with the foam of the glue stick to even out the glue and to make it evenly tacky. I apply the glue before loading the file, that gives the glue some time to get tacky.
  5. Make sure all print heads are level, so they dont hit the model. Before starting the print, make sure there is not any dried up plastic at the end of any print jet which could mess up your model printed on another jet.

My standard routine:
  1. Power up the printer. (the print bed was already cleaned after the last print).
  2. Select the "Home" button. This will move the print jet behind the print bed so you can do step three.
  3. Make sure the jets dont have any (not even a tiny piece at the tip) of filament left stuck on them otherwise it can affect your z-gap measurement.
  4. Only for larger parts I recheck the print bed leveling to ensure good adhesion over the whole part.
  5. Hit the "z-gap" menu button and check or adjust the z-gap with the up/down button.
  6. For PLA spread a very thin even layer of glue to the print bed area the print will be on.
  7. Insert the memory stick with the print file and load the print file.
  8. Make sure the glue is tacky.
  9. Start the print.
  10. The print jet will heat up and then it starts printing.
  11. I watch when the first few layers get printed to confirm I had the z-gap correct and then let it print.
Read More..

Copyright © 2010-2022 Kabar Blog | Powered By Blogger